Scrap Paper or Reused Card: Choosing a Base for Collage
Choosing a collage base starts with the folds, layers and cut pieces you plan to use, so you can make a sturdy, satisfying picture from scraps at home.
A cereal packet lies flat beside a sheet from an old sketch pad, and both look ready for collage. Choosing a collage base is less about finding the “right” material than noticing how each scrap behaves: paper bends readily, while light card gives cut pieces a firmer landing place.
Before reaching for fresh supplies, turn over what is already in the recycling pile. A clean envelope, a paper bag, a greeting card or the blank inside of packaging can all serve, but their weight, surface and folds lead to different results.
What do you want the base to do?
Start with the finished picture in mind. A collage built from flat shapes, such as a skyline or a bowl of fruit, puts less strain on its base than one with folded leaves, raised tabs or overlapping scraps that catch at the edges.
Think about three small jobs the base may need to manage:
- Fold: Will the base stay flat, or will it bend into a card, concertina or curved form?
- Support: Will pieces lie flat, or should they stand slightly proud without sagging?
- Accept layers: Will the surface take glue and cover pieces without puckering or peeling?
A useful base does not need to excel at all three. For a simple picture made from torn shapes, flexible paper may be pleasant to handle. For a layered scene that needs to sit upright, light card can offer a more dependable platform.
When does scrap paper make the better base?
Paper suits work that involves frequent folding, curling or fine cuts. A sheet from an old drawing pad, a paper shopping bag or the blank side of a printed page can be trimmed with ordinary scissors and shaped without much resistance. Thin paper also makes it easy to build overlapping layers without making the picture feel bulky.
Its softness has a trade-off. A damp patch of glue can wrinkle a light sheet, and a large cut-out may curl as it dries. Use a modest amount of adhesive, spread it across the back of the piece rather than in a blob, and smooth from the centre towards the edge with a clean finger or the back of a spoon.
Paper is especially handy when the base itself should fold. A folded card made from drawing paper has a softer crease than one made from packaging board, and the finished piece can close without fighting a stiff spine. If the paper is very thin, glue it to a firmer backing only after deciding whether the fold still needs to move.
Printed scraps can add colour, words or pattern without another layer of paint. Check that the existing print helps rather than competes with the cut shapes; a busy background may be better turned to its plain side or covered with a broad piece of paper.
When is light card worth keeping?
Light card is useful when the base needs to stay relatively flat under several pieces. The clean side of a cereal box, a paperboard sleeve or an old greeting card can support a central cut-out while keeping the surrounding surface easier to handle. It also gives a small collage a firm edge that can be picked up without pinching the artwork.
Card is less forgiving at a fold. Packaging board may crack along a sharp crease, while a coated or glossy surface can resist glue. If the project needs a hinge, use the existing fold of a greeting card or choose paper for the folded part and reserve card for panels that should stay flat.
Its thickness can become awkward when pieces pile up. A few small card shapes may be easy to manage, but several overlapping layers can make edges stand proud and create a lumpy surface. Try lighter paper for the upper layers, or leave spaces between shapes so the base remains visible.
Look at the surface before committing. A clean, slightly textured side often takes glue more readily than a slick finish; if both sides are glossy, a different scrap may save fiddling. Do not use packaging with food residue, grease or a strong smell, since those marks can show through or interfere with the picture.
How should folds, layers and cut pieces guide the choice?
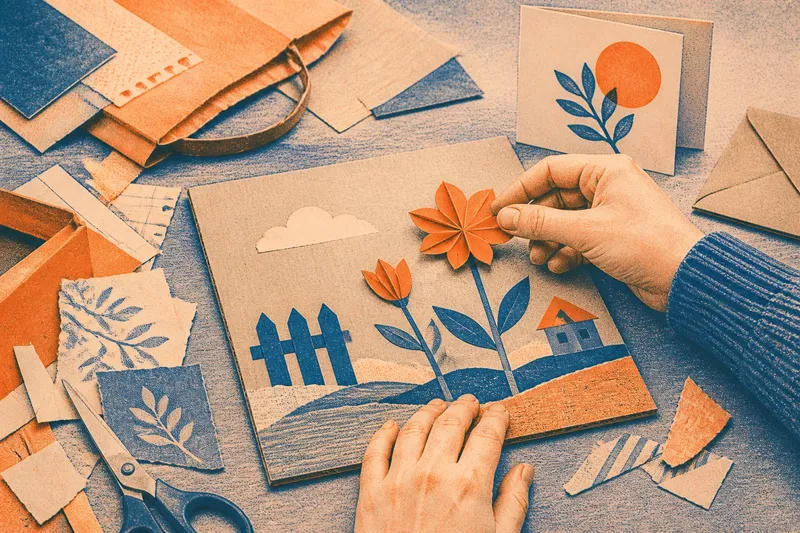
Imagine you have a clean cereal box and a sheet of scrap paper, and you want to make a small garden scene with folded paper flowers. Use the card as the flat ground, then cut the flowers from paper and fold their petals; the firmer base should help the scene stay level while the thinner pieces make the raised shapes easier to bend. If the same scene needs to fold shut like a greeting card, use paper for the hinge or make the fold on a card that already has one.
For lots of tiny cut pieces, consider the grip of the material as well as its strength. Thin paper is easier to snip into narrow stems or small windows, while card can be easier to hold steady for broad, simple shapes. A mixed approach is often sensible: choose one material for the base and another for the details.
For a layered picture, place the largest shapes first and check how much of the base remains visible. A few overlapping scraps can create depth, but repeated layers around one edge may make the piece curl or lift. If a corner keeps rising, add a little adhesive beneath that corner and press it flat while it sets, rather than coating the whole collage again.
When the base has an old crease, decide whether it belongs in the composition. A crease can mark a horizon, divide two colours or become the fold of a card; if it crosses a face or other focal shape, rotate the scrap or cut around it instead.
Which everyday scraps are worth trying?
Keep the decision practical. A clean envelope gives you a smooth, light sheet and sometimes a ready-made flap; a paper bag offers a larger, more textured area; a greeting card supplies a firm panel and an existing fold. A page from an old magazine can provide vivid printed shapes, though its thin, coated surface may be less suitable as the main support.
Packaging varies, so turn each piece over and feel its edges. A cereal carton is usually light board rather than heavy card, but coatings and folds differ; the material’s actual behaviour matters more than its label. Where a choice depends on the product’s surface or intended use, follow any relevant maker guidance or local sorting rules.
One brief test can settle a small uncertainty without wasting a good scrap: press a leftover corner with the glue you plan to use, then leave it alone until dry. Notice whether the corner lies flat, the surface wrinkles or the glue stays tacky. This is simply a check on that particular material, not a promise that another piece will behave identically.
What should you check before gluing?
Will the base stay flat under the planned layers?
Set the largest cut shapes on the base without glue and look for curling corners or a bowed centre. If the sheet already bends, choose a lighter arrangement or a firmer backing that suits the finished shape.
Can the base still fold where you need it to?
Close and open an existing fold before placing decoration across it. Keep thick layers away from the crease, or separate the folded panel from the flat collage area.
Does the surface take the adhesive?
Touch a small amount of your chosen glue to an offcut and let it dry. If it beads, slips or leaves the paper soft, switch to a more receptive scrap or use an adhesive suited to that surface.
Are the cut pieces easy to position?
Arrange the shapes first and check whether fine pieces can be lifted and moved without tearing. If they are fiddly, use broader shapes or a firmer scrap for those details.
What is not worth the effort?
There is little benefit in searching the house for a perfect sheet when a clean, workable scrap is already in reach. Nor does every crease need flattening or every edge need trimming; an uneven border can suit a handmade collage, and a natural fold may help organise the picture.
Skip elaborate layers that do not add a clear shape, texture or sense of depth. They take longer to arrange, make the base harder to fold and can bury the useful contrast between paper and card. A few deliberate pieces usually give the material room to do its job.
For choosing a collage base, follow the movement the finished piece needs: paper bends and cuts easily, while light card better supports a flat arrangement. Keep both kinds of scrap nearby, test an unfamiliar surface on an offcut, and let the folds and layers—not the packaging label—make the decision.